Running DiskDigger in macOS
This brief guide explains how to run DiskDigger in macOS.
Although support for macOS is still experimental, DiskDigger should provide all the same powerful recovery functionality as it does on Windows. The current Beta version of DiskDigger is built using Avalonia UI, which is a cross-platform toolkit that allows DiskDigger to run on various platforms including Windows, Linux, and macOS.
To run DiskDigger on macOS, download and unzip the appropriate version for your Mac's architecture:
Then simply double-click the extracted DiskDigger.app file to start it.
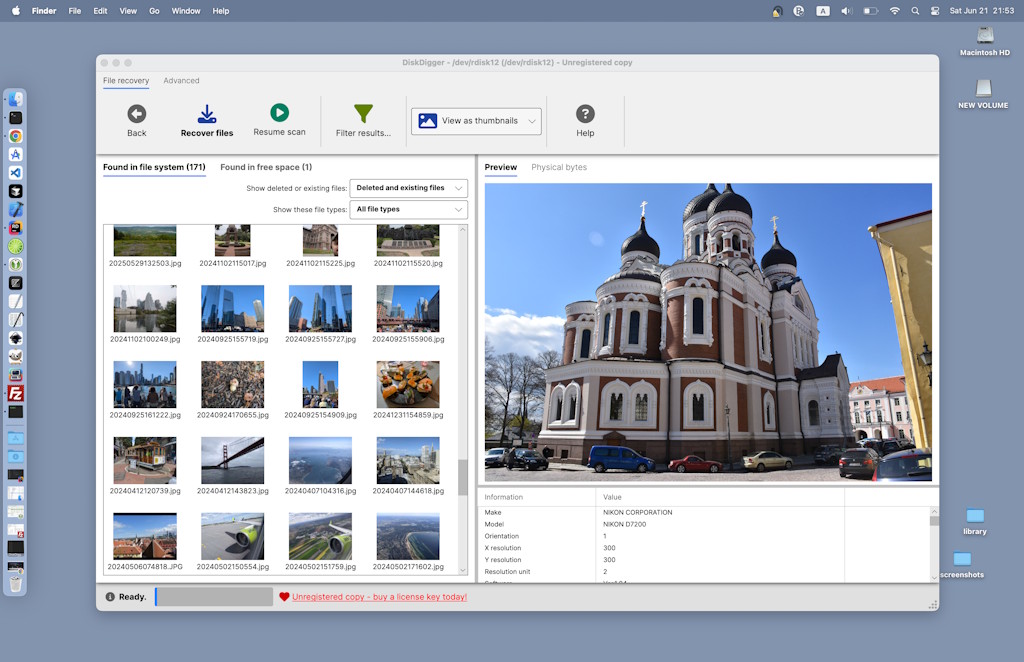
Here is DiskDigger running in macOS:
Considerations
- In order to obtain low-level access to your disks on macOS, DiskDigger installs a helper service that runs with privileged permissions. When you start DiskDigger for the first time, it automatically attempts to install this helper service, which might make your system show a notification that says "Allow this service to run in the background..." Please click Allow in this notification.
- After installing the privileved helper, you might still need to enable it manually. (If DiskDigger does not detect any disks, this might be the problem.) To make sure it's enabled, go to System Settings, then Login Itens & Extensions. In the list that is shown, there should be an item called DiskDigger. Please make sure this item is enabled (make sure the switch is turned on).
- Additionally, you also need to enable Full Disk Access for DiskDigger. (If DiskDigger detects some disks, but not all of them, this might be the problem.) To enable Full Disk Access, go to System Settings, then Privacy & Security, then Full Disk Access. In the list that is shown make sure the switch for DiskDigger is turned on, which should grant access to all disks.
- If you plan to use DiskDigger to scan disk images (not physical disk devices), then neither the privileged helper service (mentioned above) nor Full Disk Access is necessary, and can be switched off.
-
DiskDigger tries to automatically detect the disks in your system by searching for devices of the form
/dev/rdisk0, and so on. If your disk has a different device name, or if you want to scan a particular partition (e.g./dev/rdisk0s1), you can actually pass it as a command line parameter to DiskDigger:open ./DiskDigger.app --args -f /dev/rdisk0s1
Have fun!
...and let me know if you encounter any issues!